Finished String Bag

I finished my string bag- it was a very fast project.

string-bag.jpg

I tried putting a bunch of bananas in it and it stretched out to be much longer than I expected. I was originally thinking of using this for things like apples at the farmers market, but I think I will knit another that is much shorter for that and use this one for bread and other less heavy things.

I based this pattern on the one found here:

http://tiajudy.com/stringbag.htm

I used the variations listed and started with casting on 8 stitches. I knit 18 rows ( 9 ridges), picked up 8 stitches on each side( 32 stitches) and then worked one row of (yo,k1) to increase to 64 stitches. I then followed the pattern instructions for Turkish stitch for 12 inches. At the top edge, I (k2tog) 8 times, k16, (k 2tog) 8 times, k16. I then worked 8 rounds in garter stitch. I then k8, bound off 16, k8 ( can put these on a holder, although I just left them on my needle), bound off 16. I then knit the strap in garter stitch until it was about 15″ and then finished off by attaching it to the live stitches on the opposite side with a 3 needle bind off.

I dyed around 150 yards of yarn and still have some left, so It takes a little less than that. I’m going to make another one very soon, and only knit the body length 5-6 inches. I think these will be very handy for the Farmer’s market!

Hand-dyed Yarn

I have been working out a knitting pattern for a string bag. After a failed first attempt and doing some math to figure out a size that would work a little better with my yarn, I ripped out my first bag and decided that it would be more fun to knit the next time if I dyed it in striped sections. Here are my results from yesterday’s dyeing session (using leftover bits of dye from past projects).

hand-dyed yarn

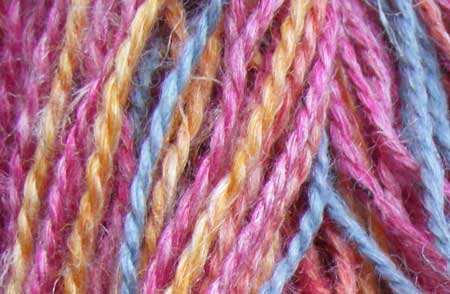
Here’s a close-up:

close-up yarn
This yarn is a hemp/wool blend, so only the wool part dyed as I used an acid dyeing method. This resulted colors that are a bit more subdued than usual for the dyes I used. Hopefully, in a few days I can post a picture of my finished bag!

Cutting up a t-shirt

Here are some pictures and explanations to show how I recycle a t-shirt into “yarn” for knitting.

First, cut the hems off of the bottom and sleeves of the shirt. Cut off the sleeves. Cut the shirt across the chest right at the armpits.

T-shirt 1

Next, take the main body of the shirt and fold it over, leaving the right side folded to around 1inch from the left side.shirt2

Next, cut across the shirt through all of the layers, leaving the far left bit uncut. I’ve highlighted where the cuts will be made by drawing with a sharpie marker. Cuts can be anywhere from 1/2 inch to 1 inch. Mine are usually around 3/4 inch, but they vary a bit, which is fine. I don’t really measure, just eye it and cut.

shirt3

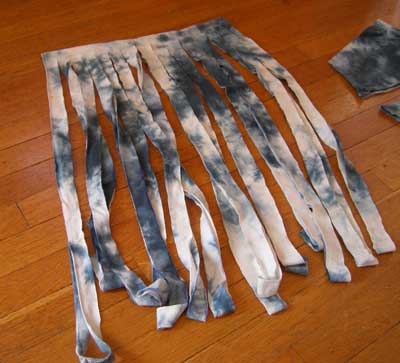
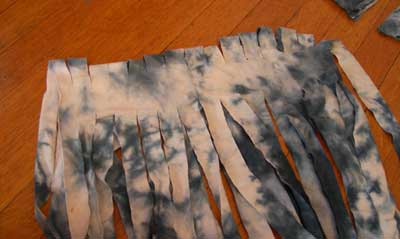
Here are a couple of pictures showing the shirt as I began the cuts and then when I had finished them.

shirt4shirt5

Shake all of the ends out.

shrt6

Shift the cut ends so that you can see the entire un-cut section.

.shirt7

Next, I begin by making a diagonal cut across the un-cut section. Start from the outside edge, cutting across to the first cut section. In the photo below, I’ve highlighted the areas to be cut with a sharpie marker.

shirt8

shirt9

Finished! One continuous strip of t-shirt yarn!

shirt10

To make a continuous strip from the sleeve, I cut in at a diagonal from the edge and then just cut around and around the sleeve. This same technique can also be used when cutting up the main body of the t-shirt, but it takes quite a bit longer than the method I detailed above.

shirt11shirt12

Now, I wind up my yarn into balls and start knitting!

shirt13

The top part of the shirt can be saved to be pieced into linings or can be cut apart at the shoulders and then sewn together at the side seams to create a tube of fabric that can be cut into a continuous piece following either the option for cutting up the main body of the shirt or for the sleeve.

Recycled Knitting

A local organization is sponsoring a recycled art contest and I decided that I’d like to enter. I played around with a few ideas for entries and began a few small projects before realizing that what I really love is knitting and that I’d like that to be my art medium. I’ve seen a few knitting projects using strips cut from recycled plastic grocery bags, and I tried some small projects but found them difficult to work with and missing the fiber feeling that I love when knitting. I decided to experiment with cutting up some old outgrown and worn t-shirts that were sitting around that were not quite usable enough to be donated to anyone. I played around with some swatches and a few different patterns before settling on using a knitted bag pattern I’d used several times previously, adapting it a bit for my needs. The pattern is the Himalaya Trinket Bag in the Just One More Row Beautiful Bags pattern here:

http://www.justonemorerow.com/9/162.htm?620

I love the patterns from this company and I love the way this bag turned out. My t-shirt version was knit on size 11 needles and is about 14 inches tall and 13 inches wide. It used most of 5 t-shirts and one dress, so it’s pretty heavy and sturdy. I sewed in a lining pieced from parts left over from the two black t-shirts.

Here is a picture of the finished bag as well as a close up of the detail of the front flap and crocheted button.

Recycled t-shirt bag

Detail of crocheted button and front flap

Hello world!

This site may be used in many ways. I plan to share knitting and other creative projects, family life events and whatever else strikes me. I’m sure I’ll figure it out as I go along!